

More than likely you’re reading this blog post because this is your first purchase of a KVANT laser show projector, congratulations! There are just a few very simple steps that you’ll need to do before you can start displaying amazing laser content.
Simply click the video above and follow the steps provided and you’ll be on the path to lasing in no time! If you’d prefer to follow written instructions, continue reading this article as we’ve created a written step-by-step guide to get you started.
Before getting started, please read the laser safety warning that has been written below.
Make sure you use your KVANT laser display system in the safest possible manner and in accordance with the legislation in respect to the region where you are using it.
Don’t look directly at the laser beams or the laser projectors aperture (meaning the window on the front of the laser). Make sure that no one can access the are where the laser emission (or laser output) may occur during the setup and performance. Also, avoid pointing the laser at reflective surfaces.
Neither we, or the producer of this video guide, nor KVANT Laser Limited as the manufacturer, accept any liability for damage to property or heath caused by following the instructions in this video.
You are fully responsible!
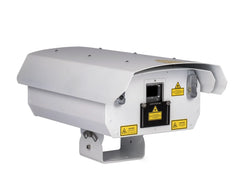
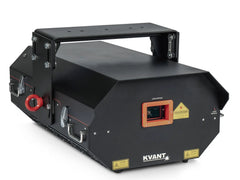
Step 1. Unpacking Your Laser System
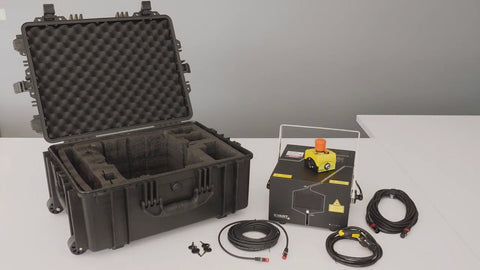
Start by opening the provide flight case and taking out the laser projector along with the provided accessories. Then place the laser projector on a firm, flat surface.
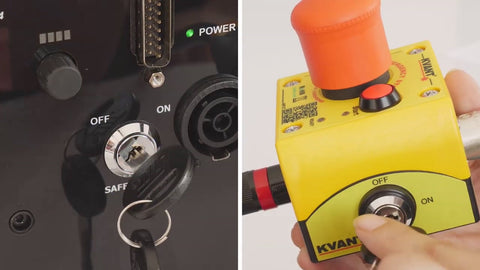
Step 2. Emergency Stop Remote (aka the E-Stop)

Now you need to connect the Emergency Stop Remote to your laser projector.
To do so, you’ll connect the female end of the supplied 3-PIN XLR cable to the “input” socket on the back of the laser projector. Then the other end will go in the “input” socket on the E-Stop remote.
Step 2a. USA Customers Only*
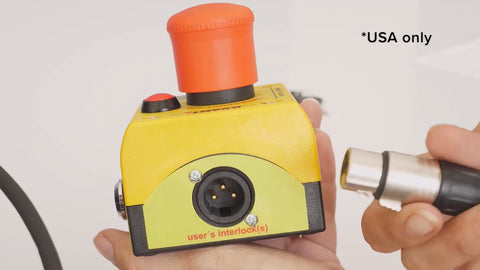
If you’ve purchased your KVANT laser system in the United States, you will need to insert the 3-PIN safety interlock dongle into the “user safety interlock” port on the E-Stop remote.
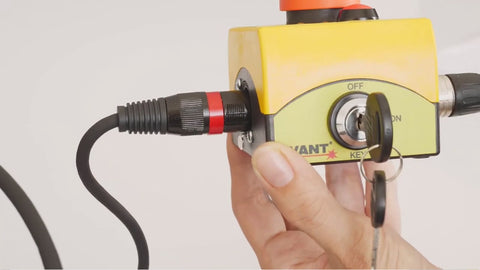
Step 3. Safety Keys
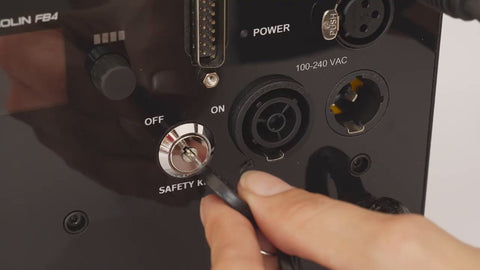
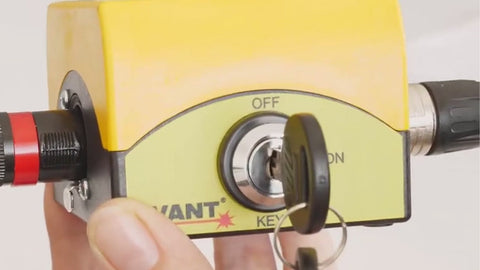
You will be supplied with two sets of safety keys with your KVANT laser projector. If this is not the case, please contact our sales team at sales@pangolin.com.
Insert one set of the keys into the back of your laser projectors, and the other set of keys into your E-Stop remote. *Do not turn the key to the on position just yet.
Step 4. Connecting Your Laser Projector To A Control Device (PC, Lighting Console, Switch, External Control Hardware)
There are a bunch of different ways that KVANT laser projectors can be controlled with Pangolin’s FB4-SK inside. You can learn more about the different operation modes on the Pangolin Wiki, click here to learn more.
However, this guide will use the most common and easy method of control called “Streaming Mode”, where the FB4 streams data to Pangolin software (QuickShow or BEYOND) with an ethernet cable over a network connection.
Follow our quick guide HERE, to begin controlling your lasers from a lighting console.
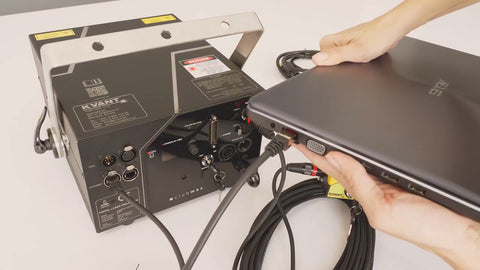
Moving forward, using the supplied ethernet cable, plug one end of the cable into either of the RJ-45 (ethernet port) ports on the back of the laser. It doesn’t matter which port you use, as they are a part of a built in switch.
With the one end of the cable, plug it into your desktop or laptop computer’s ethernet port, usually located on the side of a laptop, or the back of a desktop computer.
Step 5. Getting Power To Your Laser
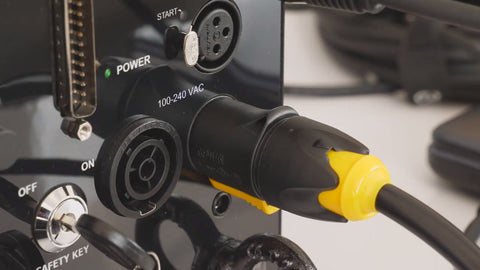
Using the black and yellow TruCon power cable that came with your accessories, plug it into the back of your laser, then to whatever power source you plan to use.
If you’ve seen the older models of the KVANT laser projectors, you may be wondering where the power buttons has gone. With the new cables, there is no need for a power button, as these TruCon replace the need for one.
Step 6. Opening The Laser Aperture

On the front of the laser you will see what looks like a small window, this is called the “laser aperture window”. Loosen the small knob and slide the window down. *DO NOT look into the window from any frontside direction.
Step 7. Starting Your Laser Projector
I know, you’re ready to get your laser on, so let’s get this party started! Go back to your safety keys and turn them to the on position. After doing so, make sure that the E-Stop Button (the giant red one) is released, meaning that it’s not being pressed down. If it is, pull it up to release it.
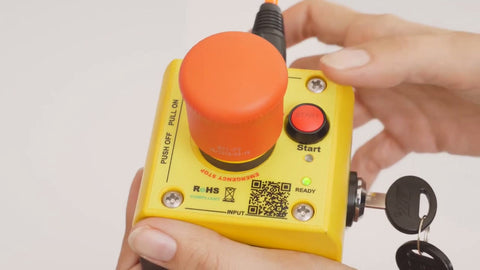
Now it’s time for lift off! Press the start button on the remote and within a few seconds you should hear your laser begin to power on. Once powered on, the laser will be awaiting instructions from your control system, in this case our laptop/desktop computer.
Step 8. Setting The FB4 To The Correct Control Mode
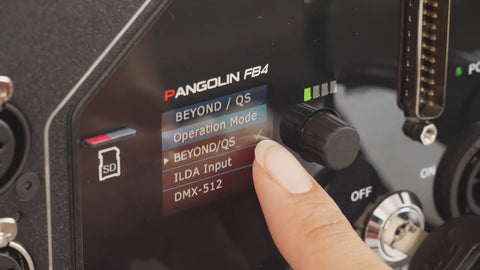
We’re almost there. We need to verify that the laser is set to the right control mode, to do this, press in the rotary knob on the back of the laser, the FB4 should now light up.
Make sure you’re on “Operation Mode” and press the knob in to open the drop-down menu. If you do not a see green checkmark where it says “BEYOND/QS”, twist the knob right to move down, and press in to select the operation mode.
The laser is now ready for action!
Step 9. Installing The Laser Control Software
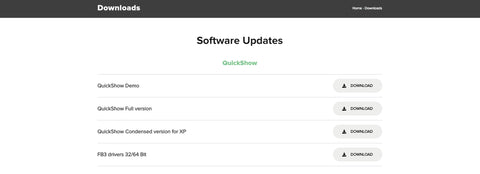
If you already installed Pangolin’s QuickShow software, you can move onto the next step. For a direct download to the QuickShow software, click here. Or visit our download page here: https://pangolin.com/pages/downloads
Step 10. Getting QuickShow Setup

Follow the on-screen instructions needed to get the software setup and opening, once completed, the software will open and a setup guide will be displayed.
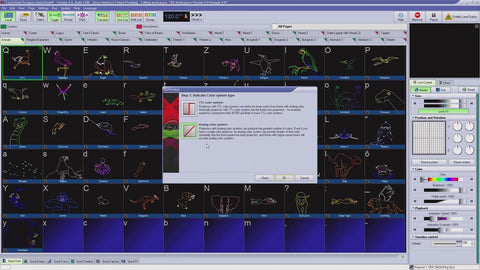
There are three very important parameters you will need to click when starting. You may choose whichever user level you’d like to use, then pay attention when moving forward.
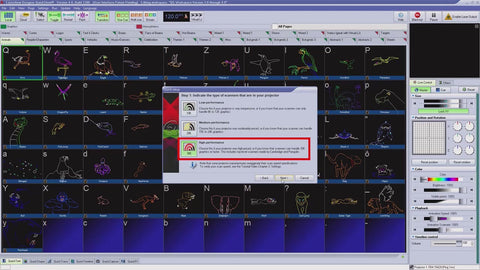

- Step 10a. High-Performance Mode.
- Step 10b. Three-Laser (RGB) Projector.
- Step 10c. Analog Color System.
You’re done it! It’s time to make some laser projections.
Click the “enable laser output” button, found in the top right-hand corner of the software. Then click any of the laser gobos/cues seen on screen.
Isn’t it amazing? Beautiful laser light at the push of a button.
Step 11. Extra Tips/Hints
This portion of the article dives into a few various settings inside of the software that if you’re unsure how to use outside of what we are going show you, could in fact cause damage to the scanning system that you’re liable for, not KVANT or Pangolin.
Step 11a. Making your projection larger.
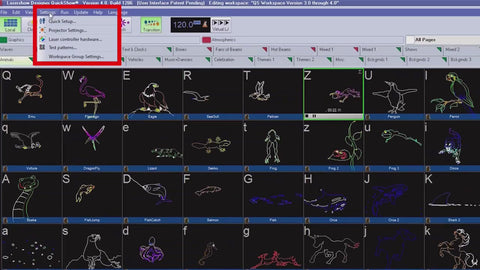
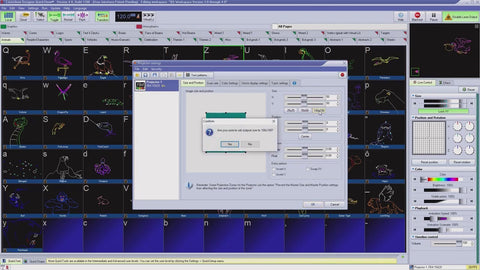
In the top left-hand corner of the screen click “settings” and “projector settings”. Inside this window you will see settings for size X/Y, and under that you will see a button that says 100x100. Click this button and then click yes. This will now make your laser project at full size.
Step 11b. Properly Set Scan Speed
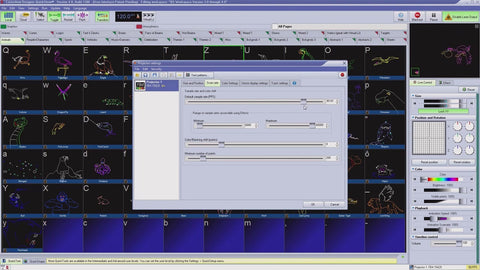
Before setting this value, you should verify the speed that your laser projector is rated for. If you’re unsure, you can reach out to us at support@pangolin.com and we will be happy to help. Typical speeds for lasers such as the ClubMAX series are standard around 30K, but it can vary.
Now you’re all set and ready to project! Hopefully this guide was easy enough to follow. Below you will find our playlist of QuickShow software tutorials, taking a deep dive into the software, and showing you all the features within the software.
Check out the full playlist here:
https://www.youtube.com/playlist?list=PLAA57BE052B6F4CD4